Making a built-in wardrobe with your own hands, useful tips. Stages of making a built-in wardrobe with your own hands, everything in detail How to make a built-in wardrobe your own
have recently become one of the most common pieces of furniture. This design provides convenient. Most often, they are not purchased ready-made, but made to order. But if there is a possibility necessary materials You can make a furniture set yourself. Before you begin, you need to decide on the number/location of shelves and drawers. It is also important to plan the design taking into account the dimensions of the room. In any case, all these points need to be studied before making a wardrobe with your own hands. In this case, the drawings are a kind of starting point, and our review today will help you cope with this rather difficult task with a minimum of errors.
A feature of this type of furniture designs is that they allow you to save usable space in the room. At the same time, sliding doors for a wardrobe can be glass, mirror, rattan, plastic or bamboo.

So, let's look at the main advantages of furniture sets:
- variety of designs: built-in, rectilinear, cabinet and;
- furniture sets allow you to effectively use even a small space. This is an ideal solution for small spaces. At the same time, mirror surfaces allow you to visually increase the space;
- brevity of designs;
- filling wardrobes. Such furniture sets allow you to hide everything unnecessary. They are used not only for clothing, but also for various household items and small appliances;
- models can be built-in, cabinet and with mezzanines;
- the wall of the room, as well as the floor or ceiling can be used as the walls of the cabinet;
- wardrobes are made to order;
- possibility of independent design.

It is worth noting some disadvantages:
- rapid wear of the sliding system;
- high-quality internal filling of the cabinet is required;
- the aluminum profile may be deformed;
- Careful maintenance is required: cleaning all surfaces and guides.
For your information! To prevent the door from coming off the rail, Schlegel for sliding wardrobes is used at the joints and ends. It needs to be glued, which will create shock absorption when the doors are opened suddenly.
Types of wardrobes
Let's look at the main types of wardrobes:
- built-in models that do not have a floor, back wall and ceiling. Such headsets cannot be moved or rearranged. They consist of side walls, shelves and internal partitions. Built-in models are made to order, but you can also purchase individual elements for self-assembly;
- free-standing sliding wardrobes are equipped with doors that move on a rail. This design has a floor, a back wall and a ceiling;
- corner headsets are suitable for small spaces. It is compact in size but very spacious inside. Corner design is suitable for a small rectangular room or square hallway;
- diagonal corner completely occupy the entire corner. Such designs are more spacious and look stylish. Inside you can hide not only a wardrobe, but also bed linen and blankets.


Wardrobe materials
Before you start making a corner cabinet or any other with your own hands, decide on the material.
Tree
For durable sets, you should choose solid wood. This is a prestigious material for furniture. It is worth considering that wood is not the best option for a built-in wardrobe. The humidity level is higher in the niche. For a wooden cabinet, you must carefully select wood that is free from cracks and knots. The frames of the doors are also made of wood. In this case, it is necessary to glue them together.
Wooden sets have the following advantages:
- environmental friendliness of the material. The tree does not contain toxic components;
- increased level of wear resistance;
- aesthetics of products. Wood furniture is distinguished by natural colors and unique patterns;
- naturalness of the material;
- possibility of carrying out restoration work;
- ergonomic use of space;
- variety of styles.
Drywall

One of the popular materials is, which is made from pressed wood chips. To create a dense composition, a thermoactive synthetic resin is used. This material is easy to process.

When working with plywood, it is necessary to take into account the softness of the material. Products may become deformed when twisted. It is recommended to use washers for such connections.
Laminated plywood is also popular. At the same time, plastic reduces the influence of formaldehyde in resins.

Furniture panels
The best material for homemade structures is furniture panels. This material is known for its durability, environmental friendliness and reliability.
It is worth noting the following advantages of using this material:
- does not require significant funds;
- you can bring unusual design ideas to life;
- the product can have different shapes and designs;
- For a furniture set, you can choose functional fittings.

Location of the wardrobe in the room
Before you start creating a wardrobe with your own hands in the hallway or in another room, it is worth considering its location.
If you place the set along a solid wall, then the furniture itself will be perceived as a wall. It would be better if the closet reached the ceiling. Doors can be mirrored, which allows you to visually enlarge the room.

If you place two identical cabinets along the wall and leave a distance between them, you will get an alcove. You can put or in the resulting niche. In the living room, an alcove can be used to create an area with a false fireplace.

A practical solution would be to install the headset along the edges of door and window openings. A mezzanine can be installed above the opening. The cabinet can be recessed into specially created niches. If the size of the room allows, then small sizes can be used.
Depending on the specific design style of the room, it is not necessary to make built-in wardrobes or disguise them. For retro or glam vintage style, bulky furniture will only complement the colorful design.

It is also necessary to choose the right drawer mechanism for the wardrobe. It shouldn't be noisy.
Hallway


Children's
There are many things that need to be placed in a child's room. These are seasonal clothes and shoes, children's toys, Board games and sports equipment. In addition, you need to find a place for books, notebooks and bedding.
The sliding wardrobe is a spacious set in which you can place all your things and objects. The doors of this piece of furniture move apart to the sides, which does not take up much space.
Keep in mind that cabinet furniture is selected for children, so the shelves must be at the required height. It is important that there are no sharp corners at the ends of shelves and racks. Each thing must have a specific place, so the child will quickly learn order.
Note! When ordering externally, as a rule, it is not possible to control the consumption of material.
It is important to choose high-quality fittings; the correct adjustment of wardrobe doors depends on this. Doors should not jam or slide. Sliding systems consist of a profile and a sliding support. Roller mechanisms can be axial or bearing-based.

Choosing cabinet filling
The internal content helps decide what the layout will be. You should not place the section for outerwear in the center, as moisture from it can spread to the sides. It is better to place this compartment on the side. Boxes for bed linen are not recommended to be placed directly above the floor.

How to correctly arrange the elements and how to assemble a wardrobe with your own hands can be seen in the video below:
Number and sizes of doors, guides, rollers for wardrobes
When choosing guides for a sliding wardrobe, pay special attention to the material they are made of. The plastic profile has the lowest cost, but it is characterized by low reliability and short service life. The best solution would be to use combined rail guides, in which the supporting surface for the rollers is made of metal.
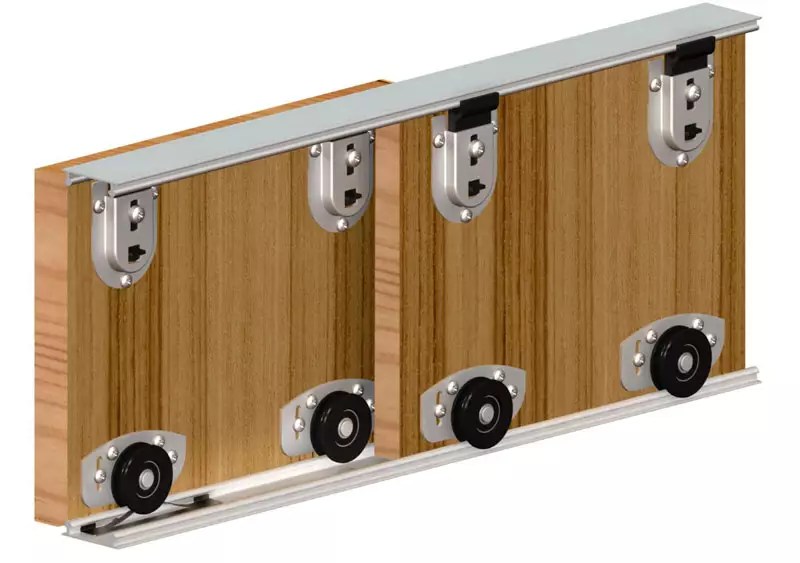
The steel profile for sliding doors has increased reliability. Furniture rail supports are made from aluminum famous brands.

The rollers are made of metal, since plastic is not durable. The roller contains a ball-bearing internal mechanism that allows the door to move freely in the horizontal direction.
Do-it-yourself wardrobe and compartment door assembly
We invite you to familiarize yourself with the process of assembling a sliding wardrobe with your own hands in the table below:
| Photo | Description of work |
 | To assemble the wardrobe, you need to apply markings. It is necessary to note the dimensions of the cabinet in width and the location of the vertical rack. The heights at which the shelves will be fixed are noted. |
 | Drill holes for dowels. |
 | The profile is put on before installation. |
 | Install a vertical stand. |
 | We mark the mezzanine shelf and install it. |
 | The side wall is installed. |
 | The shelves are marked and installed. |
 | The clothes rail is marked by size and installed. |
 | False panels are installed. |
 | One panel is fixed at the bottom. |
 | The supporting upper part is attached. |
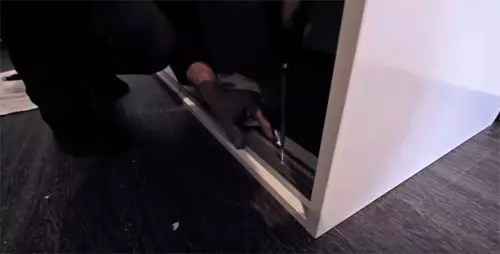 | The bottom guide is secured with a screw. |
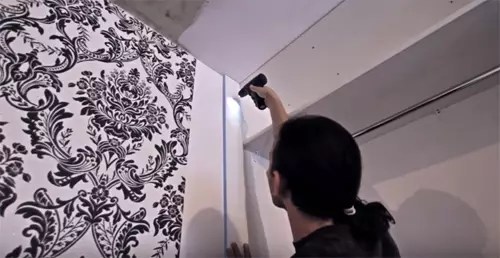
 | The top guide is attached in the same way. |
 | Doors are being installed. |
The process is presented more clearly in this video:
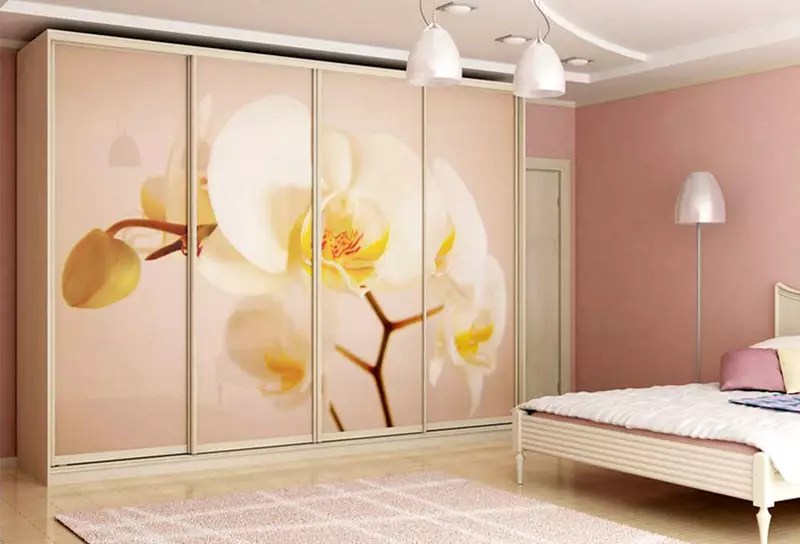
Interesting solutions for sliding wardrobes: photo examples
Don’t forget about the decor of the furniture set. Pilasters can be used as decoration. These elements are made from solid wood or MDF. You can install a furniture cornice on the roof. Interior baguette is used for decoration. You can choose a baguette of different shades. Furniture with photo printing also looks stylish.
Article
If you have a small-sized apartment, where there is not enough free space to place things and wardrobe items, you should make a built-in wardrobe with your own hands, you can remake niches or openings in the walls in a Khrushchev-era building, or equip an attic for a dressing room. This will save space, which is not enough, and money. Of course, this task is quite labor-intensive, but with proper preparation, you can create or remodel a truly convenient built-in structure.
When making a built-in wardrobe with your own hands, the first thing you need to think about is drawing up a diagram and calculating the required materials. All the nuances should be taken into account in the calculation so that the use of finished furniture is as efficient as possible. It is worth considering where cabinets, shelves, hangers and other elements will be located for convenient use of the closet. An important advantage of a built-in wardrobe for owners of Khrushchev is the ability to build it “for yourself” in order to make maximum use of all the free space with cabinets, select the optimal sizes of shelves, and choose the location of all elements.
It would be better if rods for trampolines are built closer to the ceiling, this will allow you to make good use of the cabinet space at the top. Sufficient distance between shelves for clothes is up to 40 cm. If you plan to build in a TV, stereo system or other equipment in the future, you should allocate space. If you are making a built-in kitchen furniture, think about the oven in advance. It will require a special place.
It is imperative to make drawings that clearly show how the built-in furniture will look. If you do not have the proper experience in drawing them up, you can find ready-made projects for calculations and manufacturing of built-in structures with the drawings below. It shows in detail how to make a built-in wardrobe with your own hands in a Khrushchev-era apartment, as well as specialists who understand cabinets, or home craftsmen who have already made calculations before when they built a kitchen for a new oven in the country with their own hands or did corner cupboard give with their own hands useful tips. There will also be photos of finished converted projects. You can use help computer programs to design a built-in wardrobe with all the smallest details and diagrams.
Important design features:
- Depending on whether the walls and ceiling are smooth in the place where the cabinet is planned to be built, the scope of further work is determined. It is necessary to eliminate all surface irregularities so that the structure is stable and does not collapse;
- all fittings must be the same style and color, located at the same distance from each other;
- Avoid using panels that are too long. They are quite difficult to install and may sag over time;
- Much attention should be paid to the floor. Its surface must be smooth and hard. Parquet or linoleum will not be able to support furniture that is too heavy, and the laminate will move in waves;
- When installing all the elements, it is necessary to take into account that large wooden parts will expand by a couple of millimeters due to exposure to moisture, so you should leave small gaps between them.
If you plan to add glass or mirror elements to the attic closet, it is better to use a special protective coating. It will help protect parts from scratches during use.


Material selection
The material plays an important role when we are planning the manufacture of a wardrobe or remodeling kitchen furniture for a new oven. Indicators such as the strength and durability of the built-in structure are taken into account. The most popular are wood, plasterboard, and wood-containing boards. The pros and cons of each material are shown in the table.
| Material | Advantages | Flaws |
| Solid wood |
|
|
| Drywall |
|
|
| Wood-based boards |
|
|
To avoid the negative consequences of moisture on natural wood, you can treat it with drying oil or a special emulsion.
When choosing a material, you should also take into account in which room the cabinet will be used and under what conditions:
- a built-in plasterboard cabinet cannot be installed in places with high humidity and significant temperature changes. For example, near the toilet, in the kitchen where the oven is built-in, or in the attic;
- MDF and chipboard boards are considered a universal option. They are suitable if you are planning to make a closet in the toilet with your own hands in a Khrushchev-era building, where there is always not enough space, they make excellent built-in kitchens where you can install an oven, also an ideal option for a summer house or attic;
- wood is best used for living rooms or bedrooms. It looks luxurious and presentable in any interior.
If we are talking about a small room in a Khrushchev-era building, you can think about the design of a corner built-in wardrobe. When arranging an attic house, for example, if it is a summer house, the corner location will also be very convenient.

Drywall

Solid wood

Preparing parts and tools
After you have decided on the design, filling, and materials used, you should look at the diagram again and think about whether you took into account all the nuances before manufacturing. Will you need to add shelves or cabinets, will there be enough space in the closet. Before proceeding directly to construction work, you can watch a video about do-it-yourself built-in cabinets that other home craftsmen have already done. This will help you determine the sequence of upcoming work, the calculation of this or that material and tool.
It is necessary to prepare details for:
- doors;
- guides for wheels if the doors will open according to the principle of a sliding wardrobe;
- rear and side panels, if you will install them;
- roofs;
- shelves for clothes and shoes;
- trempel rods;
- fasteners.

Elements of the room can be used as back, side panels, and floors if the walls are fairly smooth. This will help significantly reduce material costs. In this regard, new buildings are much more convenient compared to Khrushchev buildings. If there are defects or unevenness on the walls, it is better to use a separate structure that should be attached to the wall. A lighter and thinner material is usually chosen as the back panel, since the back side is not load-bearing.
If we are talking about a wardrobe, it is necessary to lay a durable floor in it so that the structure is level and the parts do not wear out quickly. If the cabinet is built into a wall or in the place where there was a niche, you can leave the floor of the room, but it must be level, covered with a suitable material.
As for tools, you should also take care of them in advance so that the process of building the cabinet does not drag on. To work you will need:
- level, square;
- pencil, awl, sharp knife;
- drill with the necessary drills, screwdriver;
- hacksaw for metal.
The set of tools will differ depending on the selected materials, design and location of the cabinet. The preparation of parts should begin with the calculation and cutting of sheets into parts. To do this, you need to draw the necessary elements with a margin of 3-3.5 mm. If you do not have sufficient repair experience in working with cutting tools and built-in wardrobes, you can order cutting of sheets in a specialized workshop or store. There they will do it quickly, efficiently, strictly according to your sizes. After all the parts are cut into elements, it is necessary to cover the edges with PVC film.
The final preparatory work is the selection of accessories. This includes handles for doors, pull-out shelves, tramples, hooks, “Euro-screws” with plugs.

Tools
The sequence of fastening all parts
A built-in wardrobe, made by yourself, allows you to make the most of the available space. If such a possibility exists, elements of the room are used as the bottom, roof, side, and rear walls. It is rarely possible to build a cabinet into a wall without both side walls; this is only possible in a niche or when designing furniture along the entire length of the wall. In any case, this opportunity to save money is worth taking advantage of.
The entire process of assembling the structure can be divided into the following stages:
- markings are made for future holes for mounting screws. In other words, they transfer the drawing to the wall where the furniture is being designed. This is a very important stage that requires maximum precision;
- install first the bottom and then the walls of the cabinet;
- after the main frame has been built in, install the back wall and attach the upper shelves, this will make the built-in structure more rigid;
- install the roof - even when making a cabinet under the ceiling, you must still leave a gap of at least 7 cm, otherwise you will not be able to fasten the “Euroscrews”. In any case, you won’t be able to use a screwdriver here; you can only tighten the screws with your hands or pliers, and tighten them with a wrench or a “ratchet”;
- mount the side shelves using “Euroscrews” or corners, 4 pieces for each shelf. Install tramp rods and boxes;
- The doors are assembled last. Here the sequence of actions depends on the choice of door type - sliding or hinged.

Preparing the installation site and developing a drawing

Preparation and fastening of the frame

Fastening the frame frames of the future cabinet

Drywall cutting

Fastening drywall

Puttying

Shelf material

Installation of shelves and guides
Door installation
Installing doors is one of the most critical stages in assembling a built-in wardrobe, since it is the doors that represent the façade of the entire structure. When installing swing doors you may encounter the following difficulties:
- if you did not install side panels, but used the wall of the room instead, it will be very difficult to insert elements for furniture hinges;
- An additional tool may be required for drilling large blind holes; not every home craftsman has such a router.
If you plan to install sliding doors, then the easiest way is to attach the guides for them using self-tapping screws, and screw the rollers to the doors themselves. If the floors and canvases are fairly smooth, there will be no problems with installation.
Depending on the material from which the door is made, additional cladding may be required. It can be self-adhesive, PVC film, colorless varnish, etc.
Installing sliding wardrobe doors yourself will require maximum attention and accuracy. Often this design is complemented with a mirror cloth for maximum ease of use. First of all, the rear door is installed; for this you will need screws, screws, rollers, corners, and a seal. The running profiles are secured at the top and bottom. Install the profile handle, corners from below on both sides, and running rollers. The fittings for the front door are attached in the same way.
If you plan to install a mirror, you need to apply a seal along the entire length of the profile; if you plan to insert chipboard, no seal is needed. Lastly, the doors themselves are installed in the grooves of the profiles, and the contents of the cabinet are equipped with tremors, baskets and other useful storage elements. Doors should close and open smoothly, without jerking or unnecessary sounds.
If all stages of manufacturing a built-in wardrobe are carried out as accurately and accurately as possible, then repairing built-in wardrobes will not take very long, and the design itself will only bring convenience and will help keep the house tidy. The video will help you better understand how to make a built-in wardrobe with your own hands. Having better studied the process of how the installation occurs, you will not have to redo anything and everything will work out the first time.

Installation of a compartment door
In any business, the sequence of actions is important. The final result depends on how clearly and clearly the whole process is presented. Understanding this, awareness of all the upcoming difficulties allows you not to abandon the assembly in the middle due to the lack of some components, spare parts, tools, etc. Instructions on how to make a cabinet with your own hands step by step will allow you not to miss a single detail.
dimensions
Initially, you need to decide where the cabinet will be located. This will allow you to decide what dimensions it will be.
- Height. Technically, only built-in structures can be implemented under the ceiling. If the cabinet is a cabinet, with side walls and a roof, the distance from the ceiling should be at least 15-20 cm. Otherwise, you simply will not lift it due to the diagonal of the sidewalls - after all, any cabinet is assembled “lying down”. The removable mezzanine greatly facilitates assembly and allows you to reduce the gap between the cabinet roof and the ceiling to 10 cm.
- Depth. For a wardrobe with hinged doors, the optimal depth is 50-55 cm, with a longitudinal rod for hangers. In a compartment, sliding doors “eat up” about 10 cm, so the depth increases to 60-65 cm. For bookcases and pencil cases with shelves, a depth of 35-40 cm is usually set. Narrower cabinets, 20-30 cm, must be attached to the wall, since they will unstable.
- Width. An arbitrary parameter, limited only by the length of the wall. For cabinets with hinged fronts, two-door, three-door and four-door options will be easier to assemble.
The first step - measurements - is especially important at the design stage of built-in and partially built-in wardrobes.
Wardrobes, as a rule, are installed from wall to wall, the entire length of the room or in a niche. Here it is important to take into account the curvature of the walls and blockages horizontally and vertically. The smaller size is used as a basis.
Wardrobe on the balcony also requires extreme thoughtfulness and accuracy when taking measurements. In conditions of limited space, any design flaws are fraught with complete rework due to the impossibility of installation.
Balcony cabinets are always prefabricated! The sides are divided by height in at least two places - for the mezzanine or lower cabinet. Otherwise, you simply won’t be able to assemble a wardrobe on a narrow balcony.
Design and content
After accurate measurements of the placement location, the internal filling of the cabinet is considered. It must comply with the functional purpose and basic rules of storage ergonomics.
When planning, it is important not to lose attention to the ratio of sections to the façade.
- Wardrobe doors are always the same width. Behind each of them there should be a full-fledged storage space, without overlaps or “dead” zones. The moving mechanisms used (pantographs, baskets, drawers, trousers, etc.) must move freely.
- Hinged fronts can be of different widths and heights, combined with pull-out chest of drawers and open niches with shelves. But in terms of design, symmetrical compositions and alternation of identical elements look better.


Based on the drawing, the details of chipboard blanks (detailing) are calculated, cutting maps and a list of accessories are drawn up. Based on these data, you can already judge the upcoming ones with your own hands.


What hand tools will you need?
It all depends on what you decide to do yourself and what to delegate.
- Cutting parts. To cut chipboard and align the ends for gluing the edges, you will need a jigsaw with a wood file, a sander or router, sandpaper, a tape measure, a metal ruler and a pencil.
- Edging. The melamine edge is glued on using an iron, the excess is cut off with a stationery knife and sanded off with sandpaper. It is difficult to glue PVC edges at home; you will need special glue and a router.
- Drilling parts. Before assembly, the workpieces are drilled for fasteners using a drill or hammer drill. You will need drills with a diameter of 5.7 mm, a confirmation drill. And also drills 10, 15, 20 mm, if eccentrics (minifixes) are used, 26/35 mm for installing hinges on swing doors. Thin awl for marking.
- Assembly. A screwdriver with Phillips and hex bits, a screwdriver or a ratchet for tightening fasteners in tight spaces.
- Auxiliary tool. The most common one, available to any craftsman: a set of screwdrivers and wrenches, a vice, pliers, wire cutters, a chisel, a hacksaw, a shoe knife, a square, a marker, a sharpener.
Purchase of fastening accessories
You can view the list of structural fittings. Furniture fasteners are calculated by the number of holes and purchased in excess. But functional and facial fittings are purchased in strict accordance with the required quantity.
Cutting the body parts and rolling the ends
At home, cutting sheet material to the size of blanks professionally and accurately is unlikely to be possible. How to process the ends: gluing the melamine edge with an iron is a better option for country, budget furniture.
Usually, cutting and gluing of PVC edges is ordered from the relevant companies. Typically, these services are offered in the same place where chipboard, fiberboard, and edge materials are sold.
The price for cutting can be calculated in different ways:
- Along the length of all cuts, per m.p.. The more small parts in the cabinet design in the form of shelves, strips and drawers, the more expensive the cutting will be.
- For cutting the sheet. It doesn’t matter how many details there are, it’s important to fit it into the sheet. Therefore, it is more profitable to cut large items (for example, wardrobes) according to moldings, and small ones (chests of drawers, bedside tables, etc.) according to sheets.
Rolling of visible ends is calculated per linear meter. PVC with a thickness of 0.4-1 mm is cheaper, and PVC with a thickness of 2 mm is more expensive. Therefore, it is more profitable to roll the internal parts of the cabinet with thinner PVC.
Facade part
The design of the furniture determines the design of the façade. In addition to the doors and the method of attaching them to the body, the following can be designed:
- Visor. Baguette (cornice), built-in lamps, arched structures.
- Base. Interesting base, decorative legs, adjustable thrust bearings.
- Sidewalls. Overlays in the form of carved columns, as well as open corner shelves of various designs.
Hinged doors
In budget options, cabinet fronts are sawn together with the body, made from laminated chipboard and rolled with PVC 2 mm thick. Sometimes furniture design involves a contrasting combination, for example, a dark body and a light facade. Then a separate sheet of chipboard of the desired color is purchased for the facades.
Also, cabinet doors can be made of MDF, lined with PVC film, plastic, veneer, and painted with enamel. Or order from an array.
The hinged façade can be overhead or internal, depending on which furniture hinges are selected. Glass and corner facades also have their own hinges.
Coupe doors
Sliding systems for compartment doors can be supported or suspended. But, as a rule, they consist of:
- Track, top and bottom guide.
- Set of rollers.
- Door leaves.
Preparing parts for assembly, drilling
Using special furniture programs, you can create specifications for drilling parts for subsequent assembly.

This greatly simplifies the process, making it more accurate and accurate. You can also make markings for fasteners manually. The main thing is to have a spatial understanding.
The process of drilling parts is also called “additive”.
For confirmation you need a hole “into the mouth” with a diameter of 8 mm from the front part of the part and a hole “into the end” with a diameter of 5 mm. Under the dowel, as a hidden fastener, the drilling “into the mouth” is done from the inside and with a diameter of 5 mm. The eccentric coupler also has its own nuances in the markings.
The attachment points for hinges, drawer guides and other mechanisms are also marked, and holes for the shelf supports are drilled.
Cabinet assembly
If the addition of parts was done correctly, the cabinet will be assembled simply and quickly, like a construction set.
- The process begins with preparing parts for assembly. The thrust bearings are screwed in, the shelf supports are driven in, and the guides are attached. The boxes are assembled separately.
- The cabinet assembly itself begins with attaching the bottom and roof of the cabinet to the sides.
- Next, the base, bearings to the base or legs are screwed.
- Stiffening ribs and non-removable shelves are installed.
- The back wall is attached.
- The cabinet rises and moves to the desired location.
- Drawers, clothes rails and other internal elements are installed.
- The final stage is installing the doors and adjusting them.
The larger the cabinet, the harder it is to assemble it alone. Therefore, it is better to involve a partner - he will support the parts and components so that you can screw them on smoothly.

Left section, assembly

Center, assembly

Right section, assembly
Here, in general terms, is the entire description of the process of making a cabinet with your own hands, step by step. We recommend that you familiarize yourself with other materials on our website - they will help you in developing a furniture design project, calculating parts and final assembly with on-site installation.
Ecology of consumption. Life hack: Building a built-in wardrobe with your own hands is quite a troublesome task. Without specific carpentry skills...
Building a built-in wardrobe with your own hands is quite a troublesome task. Without certain carpentry skills, working with wood and getting an excellent result in the end is quite difficult. But everything can be learned with experience. And if you start equipping your house with built-in wardrobes in every niche, starting with an inconspicuous cabinet on the balcony, then in the kitchen, then finding a huge niche in the living room, the cabinets will gradually give in.
It is recommended to build such cabinets for those who really have little space and a lot of things in their house, who want to save money on buying a ready-made cabinet, or who have beautiful unnecessary openings and niches in the walls created just for the cabinet.
A cabinet attached to the wall is good because it is stable, does not wobble or rattle from a person passing by. And most importantly, the absence of side and rear panels allows, with the same external dimensions of the cabinet, to gain significant useful internal volume: an entire additional large drawer (25 liters) or two extra hanging fur coats - isn’t this good luck for the owner of a dozen fur coats and a small room?
Having understood the specifics of design and installation, you can get down to business.
Design
When designing the interior space, shelves and hangers can be modeled to suit your needs. It is necessary to choose such an interval between the shelves that there is practically no empty space left.
It is better to mount the crossbar for hangers closer to the ceiling so as not to waste space.
Compartments for linen and clothes – 30-40 cm high.
If you plan to eventually build a TV or stereo into the closet, secure the space for it in advance.
After the measurements, a drawing is drawn up; you can even try to draw the entire room and the designed cabinet on a computer using special programs. Then the possibility of detailed modeling and the sketch becomes clearer.
The original walls and ceiling, or rather the degree of their curvature, can bring great help or, on the contrary, trouble into the construction of the cabinet. If the ceiling and walls are perfectly aligned and all angles between them are 90 degrees, the cabinet is incredibly lucky. Aligning the parts will be easy.
Another option is to align the planes by level and plumb (more correct and accurate), but then the walls of the built-in closet may deviate significantly from the planes of the walls (if they are very crooked) and this will be noticeable. In general, the choice of what is best to align the cabinet with is made empirically. But all parts must be without gaps, adjacent to the floor, walls and ceiling.
It is better to use the same fittings for the cabinet - handles of the same shape and color, albeit of different sizes, screwed at the same distance from the edges of the drawers and doors.
There are times when it is difficult to cut one large piece (such as a long side wall panel) from one piece of wood. Therefore, you can make long side walls through the borders, that is, attach several small boards with an overlap. Then two stripes are taken equal length, touch one to the floor, the other to the ceiling, strictly above each other and screw it in with screws. Then, in the remaining distance between them (dimensions are added for overlap), a third sheet is cut out, touched to the wall and screwed to the borders with an overlap. This will create a neat wall with borders. On the front side, these borders can be beautifully covered with doors (if they are made at the level of the overlaps).
It is better to place the cabinet on a hard surface (it is better to remove overhead floors or layers of floor “pie” with insulation). Think about whether it’s worth stripping the base of the floor down to the concrete. Hard surfaces such as parquet or linoleum will support an average cabinet; laminate flooring will most likely have to be removed, as a heavy cabinet can cause waves on the surface.
If you plan to make glass parts in the cabinet, you should think in advance whether to insert them into the doors or make them completely glass. The second option will be easier. Instead of glass, you can use a mirror, which is protected from scratches with a special coating, such as waterproof varnish.
When planning and building a cabinet, do not forget about the characteristics of the material; an important detail, for example, is the direction of the fibers in the wood board. Depending on this, you can cut the material correctly or incorrectly. Wood along the grain is much stronger than across it. In plywood, the layers of fibers are directed crosswise, so the strength qualities at any point are approximately the same. In furniture panels, it is important to ensure that the fibers are directed from one planned attachment point to another. If the fibers on the material are not clearly visible, it is considered that they run along the long side of the sheet, and the part must be cut out, taking into account the attachment points, along it.
During installation, gaps of a few millimeters must be left to allow large wooden parts to expand due to fluctuations in air humidity. These gaps can be filled with small wood chips to prevent dust from passing through. If possible, it is better not to make too long parts (over 80 cm with a width of 60 cm) that will not be supported by anything in the middle (for example, horizontal shelves), since the “fluidity” of the wood will manifest itself in a few years, and the shelf may sag.
Construction using the example of a wardrobe
Sliding wardrobes differ from ordinary built-in ones only in the design of the doors, so the principles of their installation in a wall niche are the same.
First, an internal supporting frame is made; thin panels made of various materials are fixed to the frame: ogralite, textolite, fiberglass. Load-bearing vertical panels (if they are used and not walls) are firmly attached to the wall. Gaps in the inner corners are closed with precisely fitted square or profiled slats.
You can use elements of the room as the side walls of the cabinet, as well as the floor. But if the walls are too crooked, a better alternative would be to install a separately knocked-together cabinet into the wall. This is especially important for a wardrobe, since the curvature of the planes will cause the moving door mechanisms – rollers and rails with doors – to suffer greatly or even not work.
If you install a wardrobe in a niche with uneven side walls and floor, the cabinet's construction mechanisms will quickly wear out. Therefore, before installation, all surfaces are leveled using false panels and beams. If the deviation of the walls from the vertical is insignificant, then the walls are not leveled, but the door is tilted using adjusting screws.
The opening of the wardrobe should be larger and higher than the height of the sliding panels - about 5 cm. The width of the opening of the wardrobe should allow for overlap (when one door overlaps another), it should be at least 2 cm. If there are 4 in the wardrobe sash, the overlap will be 4 cm.
Usually a wardrobe has its own floor inside the wardrobe. This is done not only from a decorative point of view, but mainly to level the floor under the rails - the lower door guide.
For linoleum and laminate, if you don’t want to disassemble it, be sure to cut a strip a few cm wide around the perimeter of the future cabinet under the rails. Sliding wardrobes are not installed on “floating floors”. For carpet, an additional floor is made of chipboard or a backing under the lower door guide so that the door does not press into the pile.
The upper guide is attached to the ceiling. The bottom rail is installed on the floor with an offset of 30 mm relative to the top rail into the depth of the cabinet. First, the doors are checked to see how they move in the grooves, and only then the guides are screwed “tightly” to the floor.
A horizontal clothes hanger is placed in the closet at a distance of at least 6 cm from the mezzanine shelf. There should be at least 150 cm from the same stick to the shelf with shoes (so that hanging clothes do not touch the shoes). The hanger should be at least 21 cm away from the back wall.
When in the extreme open position, the door should not interfere with the drawers being pulled out. It is convenient to divide the interior space of the cabinet into as many sections as there are doors in the cabinet - into two if there are two doors, into three sections if there are three doors.
The installation of doors in a wardrobe is carried out as a last resort - after installing all partitions, walls and floors and completing work on the internal structure. First, install the inner door (starting with the insertion of the upper rollers). Then the right door is installed. Before installing the doors, self-adhesive shock absorbers are installed on the side walls of the furniture frame, which will soften the impact of the door on the walls of the wardrobe. published
Organizing enough space to store everything you need and at the same time arranging maximum space for free movement around the apartment and arrangement of other pieces of furniture can become an overwhelming task, especially when it comes to small spaces. The most unclaimed areas are corners and niches. To use them rationally, it is best to make a built-in wardrobe with your own hands. 
Similar articles:
Features of built-in wardrobes
Sliding wardrobes have become widespread thanks to their design with sliding doors, which eliminate the need for additional space to open them comfortably. They can be located in the narrowest corridors - where for standard furniture it is necessary to leave a passage space no less than the width of the door leaf.
A wardrobe in a niche or corner takes up virtually no space. Thanks to the variety of designs of facade doors, you can create the most complete composition in the interior.
The main feature of the built-in wardrobe is the absence of walls; the guides are attached directly to the walls of the niche. You can also install a built-in wardrobe in the bedroom, where one corner remains free. The product is equipped with one side wall, the functions of the other and rear will be performed by the adjacent walls of the corner of the room.
Since the niches have strictly individual dimensions, the furniture built into them must be made according to individual drawings, and by doing all the work yourself, you can save money and control quality at every stage of production.
Materials and tools
To make a built-in wardrobe that will last for many years without the need for repair work, you need to carefully select the materials for its manufacture. At the same time, the opinion about natural wood is erroneous. The atmosphere inside the cabinet is different from the outside, so the filling will constantly change its structure depending on the level of humidity and will quickly lose its original properties.
The best materials for a built-in wardrobe are MDF and chipboard. They have all the properties of wood, and a special coating protects them from environmental influences. At the same time, working with slabs is much easier.
Sliding doors can be purchased ready-made if the width of the door leaf suits their installation. In the case of self-production, an MDF or laminated chipboard is used, a set of vertical and horizontal metal profiles with assembly screws and sealing tapes. To install the doors, you will need upper and lower guides, 2 rollers for each leaf, limiters that will fix the movement of the rollers strictly in a given area.
If the walls need pre-treatment, you will need putty and paint. Some craftsmen advise simply sheathing them with thin fiberboard sheets. Their surface completely ensures the safety of things. In addition, to securely fix the guides and align the horizontal planes, it may be necessary to create a frame from wooden blocks.
The tools you need to prepare are:
- drill or screwdriver;
- a hand hacksaw for metal and an electric jigsaw;
- building level, square, tape measure;
- pencil or marker;
- Screwdriver Set;
- file, sandpaper.
To drill holes in concrete walls, the drill must be equipped with a hammer drill.
Design and drawing development
Before you design your own future wardrobe, you need to accurately measure the dimensions of the niche, taking into account the need to align horizontal and vertical lines. Based on the data obtained, drawings and diagrams are developed.
At this stage you need to decide on the number of sashes and their size. To avoid strong pressure on the guide rollers, the doors should not exceed 60 cm in width. The overlap of two adjacent parts is approximately 5-6 cm for full access to things inside.
The layout of a built-in wardrobe should include contents (shelves, drawers, rods, etc.). Relying on the dimensions of the niche, we calculate the depth of the components, which should be 10 cm less than the total figure, and the width of each element, taking into account the partitions.
Sawing and fittings
You can cut the material into blanks at the time of purchase. Many stores provide such services for fairly little money. The same goes for fittings (guides, profiles). However, the master will carry out the cuts strictly according to the drawing and, if mistakes were made, such parts will not be able to be used in the future.
Since built-in wardrobes consist practically of doors and filling parts, it is better to cut the blanks on site, with constant monitoring of the compliance of the resulting dimensions with the required ones.
Fastening the frame
As such, there is no frame of the built-in piece of furniture. Its role is played by the walls of the niche. The only thing that may be needed to assemble it well is to prepare the frame for guides made of wooden beams. This procedure will simultaneously simplify the future installation of fittings and allow you to level the surface horizontally. There is no need to worry about the aesthetics of the structure, because in the future it will be covered with a slatted decorative strip.
By frame, some craftsmen mean framing the door leaf with profile strips. At the preparatory stage of this process, you need to prepare for each door 2 vertical strips-handles (the length is equal to the height of the leaf), 2 horizontal strips (the length should be 50 mm less than the width of the door, 25 mm on each side for handles), a set of accessories for assemblies.
First, all elements are located next to the door leaf to see the accuracy of the dimensions. The horizontal parts have round elements for screwing in fasteners. You need to measure the distance from the edge to its center and put a mark on the handles along which a hole with a diameter of 5 mm is drilled.
First, a profile is installed on the door at the top and bottom. Then the vertical parts are installed. A self-tapping screw is screwed through the holes, leaving a small gap for installing a positioning support in the upper profile with wheels. Only after this is the fastening screwed in to the very end.
Support wheels are inserted into the lower profile on the sides and secured with the bolts included in the kit.
Fastening the shelves
The entire filling is installed before the doors are installed. If partitions are provided, they are made of chipboard. The front cut is protected with a rubber pad mounted on any construction adhesive.
The shelves are secured with dowels or metal corners installed from below. Mobile drawers will require bearing-type sliding mechanisms. This ensures that it can be pulled to the very end.
If the depth of the closet allows, the clothes rail is mounted parallel to the door; otherwise, a special holder is purchased, which is attached to the ceiling.


