How to do decoupage. Decoupage for beginners - basic application techniques and tips for those taking their first steps (100 photos)
Decoupage is a type of decorative needlework. To update the familiar home environment, the decoupage technique is used. The basis of applied needlework is decorating surrounding objects with ready-made drawings. The closest comparison is an application that every person is familiar with. A variety of materials are used that have a smooth and dense surface.
The basis of needlework is gluing a selected pattern (special or regular napkins, newspaper or magazine paper, fabrics, other materials) onto the surface of almost any product with a dense texture. It is not allowed to use a porous plane. The background is usually painted white to preserve the brightness of the design.
Types of applied arts:
- The classic method of decoration involves gluing a picture onto a smooth surface. Various reliefs, slopes, and curves are excluded. After gluing the pattern, the product is treated with several layers of varnish. Then the errors are sanded down with sandpaper to a uniform coating. If necessary, techniques of coloring, tinting, and artificial aging of the material are used.
- The reverse decoupage method is used for glass surfaces. In this case, the image in the figure is glued face down on the reverse side, and the order of work is performed in the reverse order.
- Volumetric technique combines the techniques of artistic painting and sculptural creativity. In this case, a three-dimensional panorama is recreated on the surface of the object.
- The smoky pattern involves a complete combination of motifs on the background and image. As a result, the work is similar to the artist’s original painting.
The decopatch technique is reminiscent of a patchwork quilt, in which the storyline is created from multi-colored images of different sizes that are not connected by color or theme.
Despite the variety of techniques, needlework is quite accessible to beginners who have decided to take up decoupage for the first time.
Necessary tools and equipment
The word decoupage translated from French means “to cut,” so the work requires tools that allow you to cut out and paste the design onto the selected surface. You must first select the item to be decorated.
Basic tools:
- manicure scissors with blunt tips;
- glue brush, brushes for applying varnish to the surface;
- sponges to smooth the paper surface and remove folds;
- fine-grained sandpaper;
- PVA glue diluted with water;
- multi-colored paints, preferably acrylic;
- primer white. Acrylic or water-based paint is often used, which is diluted with water to the desired thickness;
- drawings for special purposes or independently selected.
To draw small details of the picture, thin natural bristle brushes are suitable. A ruler, eraser, and pencils may come in handy.
For needlework you need thin paper with a pattern printed on it. The following types of material are most often used:
- napkins made of three layers, of which only one with a printed pattern is used in work. The material has low strength (it breaks when stretched), so it is necessary to adapt to it when doing needlework. Napkins cost about 15-18 rubles per package;
- paper made from rice or mulberry fiber is less susceptible to deformation, but the cost of one element reaches 70 rubles;
- paper decoupage cards have low elasticity, so they use the material on a flat surface. Cards cost from 30 rubles.
Except special materials, pieces of wallpaper, glossy pictures cut out from newspapers and magazines, and thin multi-colored fabrics are used. Every home has raw materials for handicrafts.
Bottle decoupage for beginners
Decorating glass bottles, which have a smooth surface, is accessible to beginners in decoupage techniques. The result is a beautiful and original container for wine, which can be used for its intended purpose during special and festive events. 
As a covering, special napkins are chosen, which are torn to better compose the pattern.
- Before starting work, you must completely remove the old label. To do this, soak the bottle in warm soapy water for 20-30 minutes. The surface is cleaned with a metal sponge to remove the adhesive layer. The dried product is thoroughly disinfected with acetone or alcohol liquid.
- 1-2 layers of acrylic paint are applied to the surface, after which has dried, all irregularities are processed with fine sandpaper. The pasted pattern looks brighter against a light background. If it is necessary to darken part of the surface, use appropriate paints, applied with a soft sponge.
- A suitable picture is cut out from a three-layer napkin for decoupage needlework using nail scissors. You can tear out the pattern. In this case, the edges are better connected. The prepared area on the bottle is carefully treated with glue. It is more convenient for beginners to use PVA diluted in half with water. A napkin fragment is glued onto a wet surface, fixing the image from the center to the edges.
- It is recommended to smooth the picture with a brush or sponge, “driving away” excess glue. Perform the procedure over the entire surface of the bottle, gluing the drawings in a certain order or randomly. The space between the stickers can be shaded with acrylic paints of a suitable color. It is allowed to add missing details with a thin brush.
- The finished drawing is covered with a layer of glue. When the product is completely dry, apply 1-3 layers of clear acrylic varnish on top. In this case, a second layer is applied after the previous one has completely dried. The souvenir is ready. If necessary, it can be washed with warm water.
Furniture Conversion for Beginners
Decoupage needlework allows you to continue using old furniture, updating its appearance beyond recognition. 
- It is first recommended to disassemble the products into separate fragments. It is advisable to replace or clean the fittings. Glass surfaces must be degreased by treating with alcohol and dishwashing detergent without dyes.
- Metal products must be cleaned with an acidic solution (use vinegar and water in equal proportions). Then the dirt is cleaned off with a wire brush.
- Wooden products are processed with fine sandpaper to smooth out all the unevenness as much as possible.
- A primer is applied to the treated surface; after complete drying, it is recommended to clean the surface with zero-grade sandpaper.
Pictures-images are attached to the furniture surface in various ways:
- With the standard technique, renovation materials are glued to the surface of furniture fragments. After drying, the area is covered with several layers of colorless varnish.
- Reverse decoupage extends to the enhancement of glass surfaces.
- The artistic technique gives the effect of volume to the picture. In this case, manual shading of the colored background is performed, combined with the finishing of parts of the pattern.
- Using fragments torn out with uneven edges for decoration. Napkins, material that imitates the appearance of plastic, and designer paper are used.
- The volumetric technique uses fragments of napkins to create a unique finished picture. After the surface has completely dried, fragments of the image are drawn more clearly.
Step-by-step instructions for decoupage on glass
Decoration on a transparent surface is performed on the outer or inner surface. For example, a vase or bottle is decorated on the outside, since a liquid is poured inside, long-term contact of which with the varnish is not desirable. If transparent dishes are used for eating, decoupage is applied on the opposite side so that microparticles of varnish do not get into the food.
If the working surface is smooth, you don’t have to prime it, but be sure to degrease it. If desired, the background is pre-applied with acrylic paints of the selected color. 
Step-by-step instructions for decoupage needlework on glass:
- materials and necessary tools laid out at the workplace;
- the image is cut out from a napkin, rice paper or printed on your own using waterproof paint;
- a future picture is planned on the glass, the location of the pattern is marked with a marker, so that if it moves, the picture can be returned to its intended place;
- the napkin is wetted in clean water and paste onto a surface pre-lubricated with PVA glue, without waiting for the layer to dry;
- It is more convenient to straighten the napkin from the center to the edges in order to smooth out all the folds and level out air bubbles;
- carefully lubricate the product with glue diluted in half with water, applying a layer with a soft brush;
- when the adhesive base is completely dry, it is recommended to open the decoupage surface with varnish;
- The entire product is placed in the oven, gradually heating it to 150°C.
After complete cooling, the glass decorated object can be used.
The dishes can be given the appearance of historical antiquity by covering the surface with many cracks characteristic of antiques. The artificial aging technique is called craquelure.
A quick-drying varnish is applied to a not completely dry painted surface.
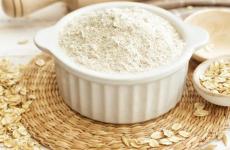
Box decoupage
Decorating a wooden box in decoupage style allows you to create a unique souvenir with your own hands. Required for work:
- small box made of wood;
- It is advisable to dilute PVA glue in half with water;
- acrylic paints and varnish;
- scissors, brushes with natural bristles;
- napkins for decoupage.
The surface of the product should be painted with white paint 2-3 times, allowing it to dry thoroughly each time. Prepare applications from a single sheet or individual components.
The outside surface is covered with a layer of glue. Without waiting for it to dry, fragments of the picture are applied, carefully smoothing the pattern, protecting the product from forming wrinkles. The top of the box is coated with a layer of glue, after which it dries, the box is opened with 2-3 layers of acrylic varnish.
Watch processing
The wooden base of the watch dial is usually renewed. First you need to disassemble the product into its components, separating the arrows and numbers. 
The work is divided into 2 stages: decorating the circle along which the hands move, and the outer contour of the clock. The first part of the decoupage is updating the arrow space:
- a circle is cut out of paper;
- the dial is cleaned and puttied, if necessary;
- napkins or rice paper are glued onto the prepared plane, the pattern of which is made in a circle of paper;
- the picture is glued to the base, leveling the plane;
- the top of the napkin is treated with glue;
- after the workpiece has dried, the middle of the dial is covered with a paper circle, and the outer part is decorated;
- a structural paste mixed with acrylic paint of the desired color is applied to the surface;
- the finished surface is varnished 1-2 times and lightly sanded after drying;
- The watch is assembled by inserting the hands and numbers into place.
How to decorate a tea house

Using the example of decoupage of a decorative house “May Roses” for tea bags, the processing of hard-to-reach places is practiced:
- It is first recommended to finish the surface of the house with a primer, dry it, sand small irregularities with sandpaper, and cover the working surface of the product with white acrylic paint in several layers. It is recommended to maintain one direction of strokes.
- The corners, the plane under the roof canopy, and the figured arch must be painted with background green paint.
- For more comfortable work, a napkin with images of pink bouquets must be ironed with a hot iron and then lightly sprayed with aerosol quick-drying varnish.
- Paper moistened with water is placed on the file so that the image hangs slightly over the edge.
- Smooth out the glued pattern to completely eliminate wrinkles and bubbles.
- Cover the surface of the house and the lid, painted green, with several layers of acrylic varnish.
As a decoration, place a butterfly figurine on the roof, and glue a decorative bouquet of roses above the arch.
With each completed job, the master’s qualifications increase. Perseverance and a flight of imagination help make your home beautiful and cozy.
What is decoupage? Decoupage is the perfect hobby. With it you can create works of art from wood, glass, ceramics, stone and many other materials. In this case, you do not need to be able to draw, sculpt or carve; all that is needed for decoupage is imagination, the ability to see beauty in simple things, patience and the desire to transform.
Historical reference
Since the 15th century, this technique has been used to decorate furniture in medieval Northern Europe. Later, when trade with the east flourished, decoupage was used to counterfeit Chinese and Japanese furniture painting.
This decoration technique became especially popular in France, hence the roots of the name; “decoupage” is a French word meaning “cutting” and reflects the whole essence of the process of decorative technique.
French mademoiselles loved to decorate their boxes with idyllic pictures in the style of Boucher or Watteau. To this day, the most popular designs for decoupage are floral motifs in romantic colors.
Decoupage as a decoration technique
What is decoupage today? In the context of the modern handmade world, decoupage is a simple and inexpensive technique for decorating various items, from furniture to tiny accessories. In order to transform an ordinary surface, you need to select a ready-made drawing made on thin paper, cut it out and glue it to the selected object. This is decoupage.
It sounds surprisingly simple and crude. It would seem, where is the art here? What item would benefit from having some kind of design glued onto it? But not everything is so simple - decoupage is not simple, and you can’t do it without an artistic approach to the matter.
A correctly selected, carefully cut and beautifully designed design can give a second youth to pieces of furniture and decor. A beautiful Christmas ball will be an original gift for the New Year; On Easter you can surprise your loved ones with beautiful Easter eggs; A uniquely designed bottle of wine will decorate any holiday table.
All this can be done with your own hands and without any special costs using a decoration technique called decoupage. The photos presented in this article only open the door to the magical kingdom of decoration.
Necessary materials

The following materials are required for decoupage.
- The surface to be decorated is any object that is planned to be transformed. It's best to start with smooth, level surfaces, such as a box, cutting board, flower pot or bottle. Degreasing liquid or wet wipes to clean the surface from stains, dust and grease.
- Ground coating; for glass and ceramics, a layer of acrylic paint is enough; for wood, it is best to use a professional primer, and apply the paint after the primer layer has dried.
- Designs suitable for the selected surface. Napkins, newspaper and magazine clippings, or even pre-printed drawings are suitable for this purpose.
- Scissors; It is best to use small thin scissors to more accurately cut out small details of the design. You can cut out designs using a stationery blade.
- Decoupage glue or PVA glue.
- Set of brushes and sponges; Instead of sponges, you can use small pieces of sponge, which are convenient for applying ground layer paint to the surface. A flat brush made of artificial fibers is most convenient for smoothing the paper while applying a design to the surface, and thin brushes are necessary for applying additional lines and finishing touches.
- Fine sandpaper or very fine polishing paper is especially necessary when working on wood.
- Acrylic varnish for the finishing layer.
Of course, you will need a number of containers for paints, a palette, masking tape and a container of water. The above materials are enough to master the decoupage technique. However, there are a number of additional accessories and materials used in this technique: various kinds of sparkles, gilding, varnishes for artificial aging (craquelure) and sandpapers for polishing and rubbing.
DIY decoupage
For the first works, it is best to decorate objects with smooth and strong surfaces, use PVA glue (it dries transparent and is easily washed off) and drawings made on napkins. In this case, even if the first attempt at decoupage comes out lumpy, you can carefully wash everything off the surface with water and try again.

In terms of technique, decoupage for beginners is no different from professional decoupage - the same tools and materials, the only difference is in manual dexterity, knowledge of textures and the ability to foresee the end result.
The main task when applying a pattern to a surface is to glue it so that no folds, lumps of glue or air bubbles form under it. To do this, the drawing is moistened with water and smoothed over the surface using a wide flat brush. This is not easy, especially considering how easily a wet napkin tears. It may take several attempts before the drawing fits perfectly.
One of the little tricks is to apply the design using a plastic file. To do this, the drawing is placed “face down” on a regular file (not in the file, but on top) and smoothed out using a brush and water. The design must be completely covered with water and fit tightly to the file, without wrinkles.
Using a file, the design can be easily applied to a surface coated with PVA glue. The main thing is to carefully remove all the water from under the file after application; you can use a spatula or a soft towel for this. This method is convenient for working on wide and flat surfaces.
Decoupage of glass objects

In modern needlework, turning bottles into objects of art occupies a separate and honorable place, but not only bottles can be transformed using the decoupage technique. With your own hands, you can create unique and bright things from ordinary plates, vases, glasses and jars that will become home decoration or a wonderful gift for loved ones.
Used bottles can be transformed into exquisite vases and souvenirs using only acrylic paint, glue, varnish and selected designs on paper. Decoupage makes you see the potential in familiar and boring things and turn them into unique ones. It is this attitude towards surrounding objects that best answers the question “what is decoupage.”
Easter decoupage - photo master class
The Internet is replete with various options for coloring eggs for Easter, and Easter decoupage offers a new approach to this interesting tradition.

Using the decoupage technique, you can decorate wooden, plaster and plastic blanks, as well as eggs, which will then be eaten. Boiled eggs are best decorated with a paste made from starch or flour, and coated with egg white for shine; thus, no harmful chemicals are used when dyeing Easter eggs.
Decoupage furniture

Once the answers to the question “what is decoupage” have been received, and your hands are familiar with the basic steps, you can move on to a more complex level and start decorating furniture using the decoupage technique. The master class on decorating pieces of furniture is different in that it is more reminiscent of the restoration process, turning grandma's old chest of drawers into a work of art.
Do-it-yourself decoupage of furniture items is associated with higher financial costs, since more material and processing time are needed. A piece of furniture, be it a chest of drawers, a stool or a table, is larger in size than the accessories, so the quantity of material increases, as does its quality.
In order to achieve the appearance of vintage antique furniture, in addition to the decoupage technique, it is necessary to master artificial aging techniques, which require a lot of time and additional materials.
New Year's decoupage

When the level of mastery of the decoupage technique has moved from beginner to intermediate and is confidently moving to new heights, you can try decoupage of a fragile Christmas tree toy. To do this, you need to select materials. New Year- the most suitable reason to use sparkles and rhinestones to create a festive composition.
The toy may be an old and boring relic in need of restoration, or purchased at an art supply store specifically for painting. It could be a ball, a Christmas tree or a symbol of the New Year. You shouldn’t limit yourself only to Christmas tree decorations; you can decorate with candles, bottles of champagne, glasses and even a tablecloth for the festive table.
Decorating various objects using ready-made pictures and ornaments is a very exciting activity, the different techniques of which can be mastered by everyone, regardless of age. Many people want to express their individuality and experience beauty, but not everyone has the skills of painting, graphics, or sewing, which will take a lot of time to master. Therefore, decoupage for beginning craftsmen will be an excellent start in mastering handmade creativity.
As an art form, it was first encountered in the 15th century in China, when they began to decorate furniture with carved images. But this hobby gained the greatest popularity in Europe, which came from Asia through Venice, which carried out active trade with Far East. Over the years, the technology has developed greatly and is still very popular in different countries. Only now, with its help, they decorate not only furniture, but also a variety of interior items, Christmas tree decorations, dishes, clothes, and other elements.
Decoupage - what is it and where is it used?
The word decoupage came from French, literally translated as “cut.” The technique consists of applying a drawing or image to the surface of various objects, followed by coating the finished composition with varnish. The activity is not difficult, but you cannot do without artistic taste. With its help, you can uniquely design various elements made from the following materials:
- glass;
- fabrics, leather, eco-leather;
- wood, MDF, chipboard;
- cardboard, paper;
- metal;
- plastic;
- ceramics, porcelain.
The scope of application of decoupage is huge. You can apply the design to different designs:
- furniture, boxes, mirrors, combs;
- pencils, pens, notebooks, notepads, covers, books;
- flasks, bottles, napkin holders;
- trays, plates, tea sets, bread bins, refrigerator, microwave, other kitchen products;
- clothes, shoes, bags, hats, all kinds of fabrics;
- clocks, paintings, albums, flowerpots;
- tablecloths, duvet covers, curtains, other textiles.
Necessary tools and materials for creativity
Beautiful decoration of objects, made with your own hands, can become an exciting hobby that will allow you to create magnificent compositions. Using decoupage you can decorate a variety of surfaces and things. However, it should be remembered that when working with materials that do not absorb varnishes and dyes, it is necessary to use special formulations designed for specific raw materials.
Before you start practicing this technique, you need to select a workpiece on which the drawing will be applied, prepare the consumables and tools necessary for the work. The success of the created composition largely depends on correctly performed actions, so the issue should be approached with all responsibility. To do this, let's look at the preparatory process in more detail.
Selecting a base
Decoupage can be applied to objects made from almost any material, be it wood, plastic or glass. But often beginners are faced with the question of where to start, what base to choose for work, so as not to spoil the interior item during training. The problem is easy to solve; for this you can use:
- Special blanks made from untreated wood, MDF, papier-mâché, which can be purchased in specialized stores.
- Old things quietly gathering dust in the attic or closet. By preparing and decorating their surface.
- If it is not customary to store outdated items in your home, you can stroll through flea markets in search of interesting items.
- Walk through the rooms and look around, you can probably find shabby, unpresentable things or furniture. These could be tables and chairs, trays, mirrors, a sofa, a cabinet, and other elements.
List of tools
To carry out any activity you need to have certain tools at hand. Decoration cannot be done without a minimum set special means. Very few are needed. Let's consider the list of required elements used in the work:
- Sharp manicure and stationery scissors with thin and slightly curved tips for cutting paper or fabric.
- A spatula will be required when working with large wooden objects to apply primer.
- Brushes, sponge, soft textiles for applying varnish, paints, glue.
- Artistic brushes are used when necessary to emphasize and highlight certain details of a composition.
- Disposable plates, jars, and other improvised items used for mixing paints.
- A small roller that is used to smooth the glued image to remove air bubbles.
- Measuring instruments, a simple pencil, an eraser.
Consumables
Having prepared a set of tools, we begin to consider the list of consumables. To work you will need:
- Sandpaper. Used to clean the surface of the base. You should choose a product with medium to fine grain. The first type is used for initial grinding, the second - for finishing.
- Degreaser. Alcohol, white spirit, acetone, alcohol wipes, vodka.
- Putty. Used to eliminate defects on the surface of wood.
- Primer. It is recommended to use an acrylic primer; it can be purchased at specialized outlets.
- Glue. There are special compositions for decoupage work, but they are quite expensive. Experts say that ordinary PVA is in no way inferior, it is invisible, and glues components well.
- Acrylic paints. Necessary for coloring or drawing on an image. They dry quickly and are easy to work with.
- Magazines, paper, photographs, napkins for decoupage.
- Acrylic lacquer. You can use any options to give the desired effect, be it shine, matte or craquelure.
Selection of napkins and paper
To apply the image use different materials. Most often, three-layer napkins, but the list is not limited to this. This technique can be used for various paper products:
- Napkins. It is better for beginners to use these elements for training. However, they must be handled very carefully, as they are quite thin and can tear. There are products consisting of two and three layers.
- Decoupage cards. Essentially, these are ordinary sheets of paper on which images are printed using a typographic method. They differ from each other in density and size. They are stronger than napkins.
- Rice paper. This is a very thin, loose material made from rice straw. It is as durable as cards. Suitable for decorating any item.
- Mulberry paper. Its properties are comparable to rice analogues, it is soft. Ideal for working with glass.
- Gift paper. Before work, you will need to soak it in warm water for 2-3 minutes and dry it on a cloth, otherwise it will not absorb the glue.
- Printout on a printer. You can download any drawing you like from the Internet and print it on a regular A4 sheet.
- Magazine clippings. Magazine images are similar to regular printer printouts.
- Photos, postcards. They are rubbed with sandpaper to make them thinner, then glued to the selected surface.
Decoupage cards must not be sanded on the back side.
Decoupage techniques and step-by-step master classes for beginners
You can decorate household items, furniture, accessories and other little things using a variety of techniques. The most common type of needlework is decoupage. Using napkins and other paper pictures, you can give items an unforgettable, unique appearance. For each material it is convenient and practical to apply a picture in a certain way. It is better to decorate transparent plates using the reverse decoupage technique; volumetric application is suitable for panels.
You don't need to be a professional to create original products. A simple method of decoration with a description is suitable for a beginner. To achieve the result, you need to follow the standard steps of step-by-step master classes: prepare the surface, glue the decoupage motif, paint on the edges, varnish. You can learn more about the technique by studying the following master classes.
Direct decoupage - classic technique
The method of applying napkins is often used to decorate rounded objects, vases, bottles, and pots. It is the most popular and easiest for beginners. Using this method, you can create original packaging for drinks and decorate it themed for a holiday or any celebration.
We begin work by preparing materials. The bottle must be smooth with smooth curves, without embossed inscriptions or relief. As the most portable picture, you can use multi-layered napkins, newspaper clippings, or any drawing. The thinner the paper, the easier the gluing will be. You will also need to prepare PVA glue, acetone, brushes, and acrylic varnish. Make a great gift with your own hands simply by following these instructions:
- Prepare the surface of the bottle. Soak in soapy water and clean the label;
- Degrease. Wipe with a cotton swab soaked in acetone;
- We prime. This can be glassy varnish and other suitable compositions;
- Apply darkening. Acrylic paint is suitable for this. Using a sponge, coat the entire surface or required area;
- We select a motive. We cut out a picture from a purchased napkin or magazine, and prepare a photo;
- Remove the top layer of paper. Photographic paper and thick sheets should be softened in water and divided into layers;
- Glue it. Apply glue to the bottle and place the picture against it. Then we iron it with a roller, dipping it in diluted PVA;
- We fix it with varnish. If you apply several layers of the composition, the gift bottle can be washed.
Subtleties of reverse decoupage
Using this technique, you can transform a simple glass plate, turning it into an expensive porcelain product. This will be a classic decoupage, but from the reverse side. To work, you will need a standard set of tools and materials. If artificial aging is necessary, craquelure varnish can be used to apply “traces of time.”
We start with surface preparation. Turn the plate over, thoroughly degrease it - wash it, wipe it dry, wipe it with alcohol. We try on the prepared ornament for size and carefully tear off its edges. It is better to choose one large picture than 3-4 small ones. This will make the work of a novice master easier. It is not necessary to decorate the entire surface. Flowers look good on one side, extending to the bottom and border.
We coat the napkin with varnish and attach it to the bottom of the plate.
If the paper is translucent, apply white acrylic paint over the drawing. If desired, you can make a rim using an outline.
Artistic or smoky decoupage
In this technique, the decorated picture completely merges with the background and looks like a real painting. It will be almost impossible to determine the transition boundary. You can decorate any surface with continuation of color, shadows, and recreation of the environment.
Using haze, you can convey the three-dimensionality and depth of any object. It is better to decorate a small box using this technique. This can be done before or after gluing the paper. The haze effect should always be lighter than the object being decorated. You can create haze in several ways: acrylic paints, wax crayons.
Smoky decoupage will look great on a simple box. First, we carry out standard preparation procedures, clean and degrease all surfaces. We do the usual pasting with suitable pictures. Missing details can be painted on with acrylic. Now we coat the entire box with varnish and leave to dry.
The final stage of decoration is creating haze. To do this, dip the brush in a retarder and thick paint, it is better to take one tone or a little lighter, put a dot on the edge of the drawing. Using a sponge, blend it in the direction from the edge of the picture. It is necessary to draw out the tonal transition very quickly until the mixture thickens.
When the entire surface of the box has been processed and dried, the haze of the primary colors should be slightly muted. Take a piece of sponge, dip it in the background paint and go around the edge of the picture, removing excess brightness. We coat the box with varnish.
Decopatch - ease of getting started
The deco patch technique, which is close to decoupage, is often used together in handicraft lessons. It is easy to make and suitable for beginner needlewomen. As a base, you can use a funny figurine made of any material, flower pots, any home accessories.
Papier-mâché (cardboard) figurines are ideal for creativity. We choose the right one and stock up on the materials necessary for the work.
You need to prepare several sheets of special rice paper with various designs, brushes, PVA glue, and water-based varnish. First, we prepare the material for the deco patch - we tear the paper into pieces, 2x2 cm in size, or larger ones, it all depends on the size of the craft itself. We glue pieces of paper onto the papier-mâché product with an overlap. The entire surface must be closed; gaps will look inharmonious. The joints should not be visible even at close range. We coat the figure with varnish and let it dry.
This method of decoration is suitable for flower pots that have lost their former attractiveness. Chaotic pieces with no plot will look original on a surface of any size. Visually, deco patch resembles patchwork, but instead of fabric, special thin paper is used.
To decorate a ceramic pot you will need the base itself, sandpaper, glue, brushes, sponge, paint, and multi-colored rice paper. First of all, we prepare the ceramic surface, clean it, coat it with glue and prime it. You should also grab a small strip from the inside. We tear the paper into small pieces and glue it to the pot. You can leave the surface in its original form or give it a stone structure by removing a little paint with a cotton swab and acetone. We fix the drawing with acrylic varnish.
Volumetric decoupage and its features
The technique for creating three-dimensional images is independent and unique. Having mastered it, you can create original paintings, souvenirs, and refrigerator magnets with your own hands. It is much more complicated than simple paper cutting, but can be easily mastered by novice craftsmen. It is enough to follow simple rules when working. The meaning of 3D decoupage is to layer the picture, gluing elements on top of each other.
A minimum of 5 printed copies are used to create one composition. The number of sheets depends on the complexity of the transferred image. The three-dimensional appearance of the image is given by silicate glue, glaze, and special varnish. Three zones must be distinguished: background, foreground, and an area of intermediate layers.
It is necessary to prepare for possible difficulties with gluing small parts. This may require nail scissors, tweezers, and thin brushes.
Required materials and tools
To create a beautiful “living” picture, materials and tools should be selected carefully. The paper for work should be moderately thick. It is better to use several types of it for layering. In addition to the main raw materials, the following materials and tools will be required:
- A piece of plywood, boards as a base;
- Scissors for large and small parts;
- PVA glue, silicate;
- Glaze, water-based varnish;
- Knife, cutting mat;
- Paints and brushes.
Anyone who has ever done any kind of creative work knows what joy and satisfaction a piece created with one’s own hands brings.
Vadim Zeland
So, you’ve decided to start decoupage, but you don’t know what to buy and which materials from the huge list a beginner will need first? Let's go in order.
Basis for decoupage
The first victim of a beginning decoupage artist is almost always something from the household. Glass bottles and jars, tin or plastic boxes for products - the choice is quite understandable, because all this is “at hand”. However, from the point of view of ease of work, such items are not the best choice. Glass, plastic, metal - all these are “complex” surfaces that have weak adhesion to creative materials. Needless to say, curved round shapes are difficult to decorate even for many “experienced” craftswomen.
The best option for the first work is flat blanks made of wood and plywood. Craft stores have a large selection of panels and clocks. If you still want to make small sacrifices with what you have on hand, take a wooden cutting board from the supermarket.
Decoupage tools
The most important point in decoupage is the tool. What you work with will determine whether you will enjoy the process, or whether you will suffer and curse “the day you first heard that word.”
To start the creative process you will need:

Spatula (palette knife). To apply relief paste or repair chips and cracks on a workpiece, you will need a small rubber spatula from a hardware store. More advanced craftsmen choose palette knives. If suddenly neither one nor the other is found, you can get by with an unnecessary plastic card.
If bright, rich colors - .
And if you have already chosen a decent pack of napkins and still can’t decide which one to start your creative experiments with, then it’s better to take . Eight 50 ml cans will last you a long time: all the colors mix with each other, allowing you to create new colors. And by mixing basic tones with white paint, you get light shades. Black paint will darken it.


Glue for decoupage. Glue is required to glue the motif. You can often find a recommendation to use PVA. However, it is very difficult to find high-quality PVA glue that will not turn yellow or peel over time. Therefore, it is better to take special glue for decoupage. There is also a product on sale that combines the properties of glue and glossy varnish. If neither one nor the other is found, you can glue the motif onto acrylic varnish, applying it like glue.

For your first experience in decoupage, you should also pay attention to. They contain the most necessary materials in convenient sized jars.
We recommend expanding our starter kit by purchasing one or two more. Simple, well harmonized with different shades of colors: black, white, gold or silver. Outlines are inexpensive, and adding touches to the design (even if it’s just dotted edging) can often significantly improve the appearance of the product.

;
Having all the materials and tools from this set, you will easily and with great pleasure create your first works. Over time, having gained experience, you will understand what materials and tools you still need, you will have your favorite techniques and colors. By adapting to them, you will purchase materials that you will actually use, and not put aside in a “distant drawer”.
In the future, if decoupage captivates you, you will try to supplement it with relief materials or craquelure, decorative varnishes and stencils, gold leaf and mastics, but that will come later. After all, armed with these materials, you can start decoupage right now and cover all possible and impossible surfaces with napkins.
Watch master classes for inspiration and get creative! Good luck in your creativity!
Even expensive or fashionable things cannot replace handmade items. They may not be as professional, but they will contain a piece of your love. Nowadays there are many types of needlework and techniques. One of the popular ones is decoupage. This is a special method of decoration that creates a painting effect on the surface. Decoupage has a long history. With its help, back in the 12th century, the most skilled craftsmen created masterpieces.
Decoupage allows you to turn any, even the simplest objects or surfaces into original and unforgettable. Using the technique, you can decorate small boxes and bulky furniture, both wooden and glass, plastic, paper or fabric surfaces.
The basics of decoupage are simple - it is an applique that is made from decoupage cards, special or regular napkins with beautiful images, labels, postcards, fabrics with drawings and more. To work you will need some materials and tools.
Materials for decoupage
- Glue. You can use special glue designed for decoupage or PVA.
- Primer. It will be necessary when performing decoupage on wood. The substance will prevent the paint from being absorbed into the wooden surface. A construction acrylic primer is suitable for these purposes. To level the surfaces, you should get acrylic putty. This can be found in hardware stores. On other surfaces, such as a primer for decoupage, use white acrylic paint or PVA.
- Brushes. Needed for applying glue, paint and varnish. It is better to choose flat and synthetic brushes, as natural ones fade. Their size may vary depending on what kind of work you will be doing, but No. 10, 8 and 2 are most often used.
- Paints. Useful for decorating backgrounds, drawing details and creating effects. It is better to use acrylic ones. They come in many colors and fit on different surfaces. The paints are water-soluble, so they can be washed off with water before they dry. To obtain translucent shades, thinners are added to them. As an alternative to acrylic paints, you can purchase simple white water-based paint and pigment colors for it.
- Blanks for decoupage. Everything is limited by your imagination. You can use bottles, trays, wooden boxes, flower pots, vases, frames, mirrors and lampshades.
- Varnish. Needed to protect items from external factors. The object is coated with varnish at the initial stage of work and at the end. For decoupage it is better to use alkyd or acrylic varnishes. For the finishing coat it is convenient to use aerosol varnish, which is sold in automotive stores. But to create craquelure you will have to purchase a special varnish.
- Scissors. In order not to spoil the picture, it is worth choosing sharpened scissors with gently moving blades.
- Auxiliary Tools. To simplify the work, you should get a sponge, which is useful for painting large surfaces. They will also help create different effects. A roller will be convenient for gluing large or dense pictures. You may need toothpicks, cotton swabs, a toothbrush, masking tape, sandpaper, and a hair dryer to quickly dry paint or varnish.
Decoupage - execution technique
You should prepare the surface of the item you are going to decorate. If it is plastic or wooden, it should be treated with sandpaper. Then you need to apply a layer of primer: PVA or acrylic paint. If you are doing decoupage on glass or ceramics, the surfaces of the objects need to be degreased. You can use acetone for this.
While the surface dries, cut out the desired pattern from the napkin. This needs to be done as accurately as possible. Separate the bottom 2 plain layers of paper. You should only have the top color left.
- Apply glue to the surface, attach the image and carefully smooth it out.
- Place the image on the surface and apply glue on top. Do this carefully so as not to stretch or tear the picture.
- Cover the wrong side of the image with glue, then apply it to the surface and smooth it out.
To avoid the formation of wrinkles on paper, PVA can be diluted with water. It is recommended to smooth the image or apply glue to it from the center to the edges.
When the image is dry, coat the product with varnish several times.
Video - how to do decoupage for beginners